

Unsloth를 참고하여 llama 3.1을 파인튜닝하는 과정을 정리해보았다.
(사실 사이트 참고하면 간단하긴 한데, 그래도 영어보단 한글이 보기 편하니깐..)
참고한 내용은 👉🏻 링크
GitHub - unslothai/unsloth: Finetune Llama 3.1, Mistral, Phi & Gemma LLMs 2-5x faster with 80% less memory
Finetune Llama 3.1, Mistral, Phi & Gemma LLMs 2-5x faster with 80% less memory - unslothai/unsloth
github.com
- 개발환경 : Google Colab
- GPU : T4
%%capture
# Installs Unsloth, Xformers (Flash Attention) and all other packages!
!pip install "unsloth[colab-new] @ git+https://github.com/unslothai/unsloth.git"
!pip install --no-deps "xformers<0.0.27" "trl<0.9.0" peft accelerate bitsandbytes먼저 기본 세팅부터 진행해줬다.
포스팅일 기준(24.07.26) 패키지들 간에 버전 충돌 이슈는 없었다!
# Base Model 세팅
from unsloth import FastLanguageModel
import torch
max_seq_length = 2048
dtype = None
load_in_4bit = True

model, tokenizer = FastLanguageModel.from_pretrained(
    model_name = "unsloth/Meta-Llama-3.1-8B",
    max_seq_length = max_seq_length,
    dtype = dtype,
    load_in_4bit = load_in_4bit,
)사전 학습된 베이스 모델을 우선 가져왔다.
이 모델에다가 fine tuning을 해줄 예정이다.
# lora adapter 사용 (fine tuning 가속이 가능하다고 함.)
model = FastLanguageModel.get_peft_model(
    model,
    r = 16,
    target_modules = ["q_proj", "k_proj", "v_proj", "o_proj",
                      "gate_proj", "up_proj", "down_proj",],
    lora_alpha = 16,
    lora_dropout = 0, # Supports any, but = 0 is optimized
    bias = "none",    # Supports any, but = "none" is optimized
    use_gradient_checkpointing = "unsloth", # True or "unsloth" for very long context
    random_state = 3407,
    use_rslora = False,  # We support rank stabilized LoRA
    loftq_config = None, # And LoftQ
)이 코드는 LoRA adapter를 추가해주는 과정이다.
설명에 따르면 LoRA adapter를 추가할 경우, 모든 파라미터의 1~10%만을 업데이트해도 된다고 한다.
그렇기 때문에 fine tuning 과정에서 가속 효과를 얻을 수 있을 것이다.
# Alpaca 데이터셋을 사용해 fine tuning을 실시하는 과정
alpaca_prompt = """Below is an instruction that describes a task, paired with an input that provides further context. Write a response that appropriately completes the request.

### Instruction:
{}

### Input:
{}

### Response:
{}"""

EOS_TOKEN = tokenizer.eos_token # Must add EOS_TOKEN
def formatting_prompts_func(examples):
    instructions = examples["instruction"]
    inputs       = examples["input"]
    outputs      = examples["output"]
    texts = []
    for instruction, input, output in zip(instructions, inputs, outputs):
        # Must add EOS_TOKEN, otherwise your generation will go on forever!
        text = alpaca_prompt.format(instruction, input, output) + EOS_TOKEN
        texts.append(text)
    return { "text" : texts, }
pass

from datasets import load_dataset
dataset = load_dataset("yahma/alpaca-cleaned", split = "train")
dataset = dataset.map(formatting_prompts_func, batched = True,)이제 데이터를 가지고 사전학습된 모델을 fine tuning 해주면 된다.
사용한 예시 코드에서는 alpaca 데이터셋을 사용했으며, 프롬프트도 정의해줬다.
물론 원하는 데이터셋으로 교체해 fine tuning을 할 수 있으며,
만약 그럴 경우에는 alpaca 데이터셋 특징을 파악해서 그것과 동일하게 구성하면 될 것 같다.
# 모델 훈련 세팅
from trl import SFTTrainer
from transformers import TrainingArguments
from unsloth import is_bfloat16_supported

trainer = SFTTrainer(
    model = model,
    tokenizer = tokenizer,
    train_dataset = dataset,
    dataset_text_field = "text",
    max_seq_length = max_seq_length,
    dataset_num_proc = 2,
    packing = False, # Can make training 5x faster for short sequences.
    args = TrainingArguments(
        per_device_train_batch_size = 2,
        gradient_accumulation_steps = 4,
        warmup_steps = 5,
        # num_train_epochs = 1, # Set this for 1 full training run.
        max_steps = 60,
        learning_rate = 2e-4,
        fp16 = not is_bfloat16_supported(),
        bf16 = is_bfloat16_supported(),
        logging_steps = 1,
        optim = "adamw_8bit",
        weight_decay = 0.01,
        lr_scheduler_type = "linear",
        seed = 3407,
        output_dir = "outputs",
    ),
)훈련 세팅에 관한 코드고, 이 부분은 필요에 따라 바꾸면 될 것 같다.
# 훈련합시다..
trainer_stats = trainer.train()훈련 시작.. 한 7~8분 걸렸다(TPU 기준)
# 모델 굴리기 (알파카 프롬프트 형식으로 사용 -> output을 깔끔하게 출력하도록 textstreamer를 사용했음)
# alpaca_prompt = Copied from above
FastLanguageModel.for_inference(model) # Enable native 2x faster inference
inputs = tokenizer(
[
    alpaca_prompt.format(
        "Continue the fibonnaci sequence.", # instruction
        "1, 1, 2, 3, 5, 8", # input
        "", # output - leave this blank for generation!
    )
], return_tensors = "pt").to("cuda")

from transformers import TextStreamer
text_streamer = TextStreamer(tokenizer)
_ = model.generate(**inputs, streamer = text_streamer, max_new_tokens = 128)훈련이 끝났으면, 훈련된 모델을 가지고 놀아보면 된다.
위에서 정의한 프롬프트 양식에 맞게 질문을 하면 되는데,
introduction에는 질문을, input에는 뭔가 부가적인 정보 정도를 담아주면 될 것 같다.
output은 답변이니 특별한 경우가 아니면 비워두면 되겠다.
여기 예시에서는 1, 1, 2, 3, 5, 8을 제시해주고 이 뒤에 쭉 피보나치 수열을 이어가라고 시켰다.
여기서 TextStreamer를 사용하면 QnA 과정이 조금 더 깔끔해지는 장점이 있다.
# 모델 저장
model.save_pretrained("lora_model_0726") # Local saving
tokenizer.save_pretrained("lora_model_0726")만든 모델을 저장하고 싶다면.. 그냥 이렇게 ㅎㅎ;
# 입력받은 질문 사용해서 모델 사용해보기
while True:
  print("질문을 입력하세요.")
  question = input()

  if question == "":
    print("QnA를 종료합니다.")
    break

  inputs = tokenizer(
      [
          alpaca_prompt.format(
              question, #instruction
              "", # input
              "", # output
          )
      ], return_tensors = "pt").to("cuda")

  text_streamer = TextStreamer(tokenizer)
  _ = model.generate(**inputs, streamer = text_streamer, max_new_tokens = 128)

print()간단하게 QnA 시스템을 만들어봤다.
그냥 실시간으로 질문을 입력하면, 알아서 모델이 답변해주는 형태다.
그렇다면 결과는 어떠한가..
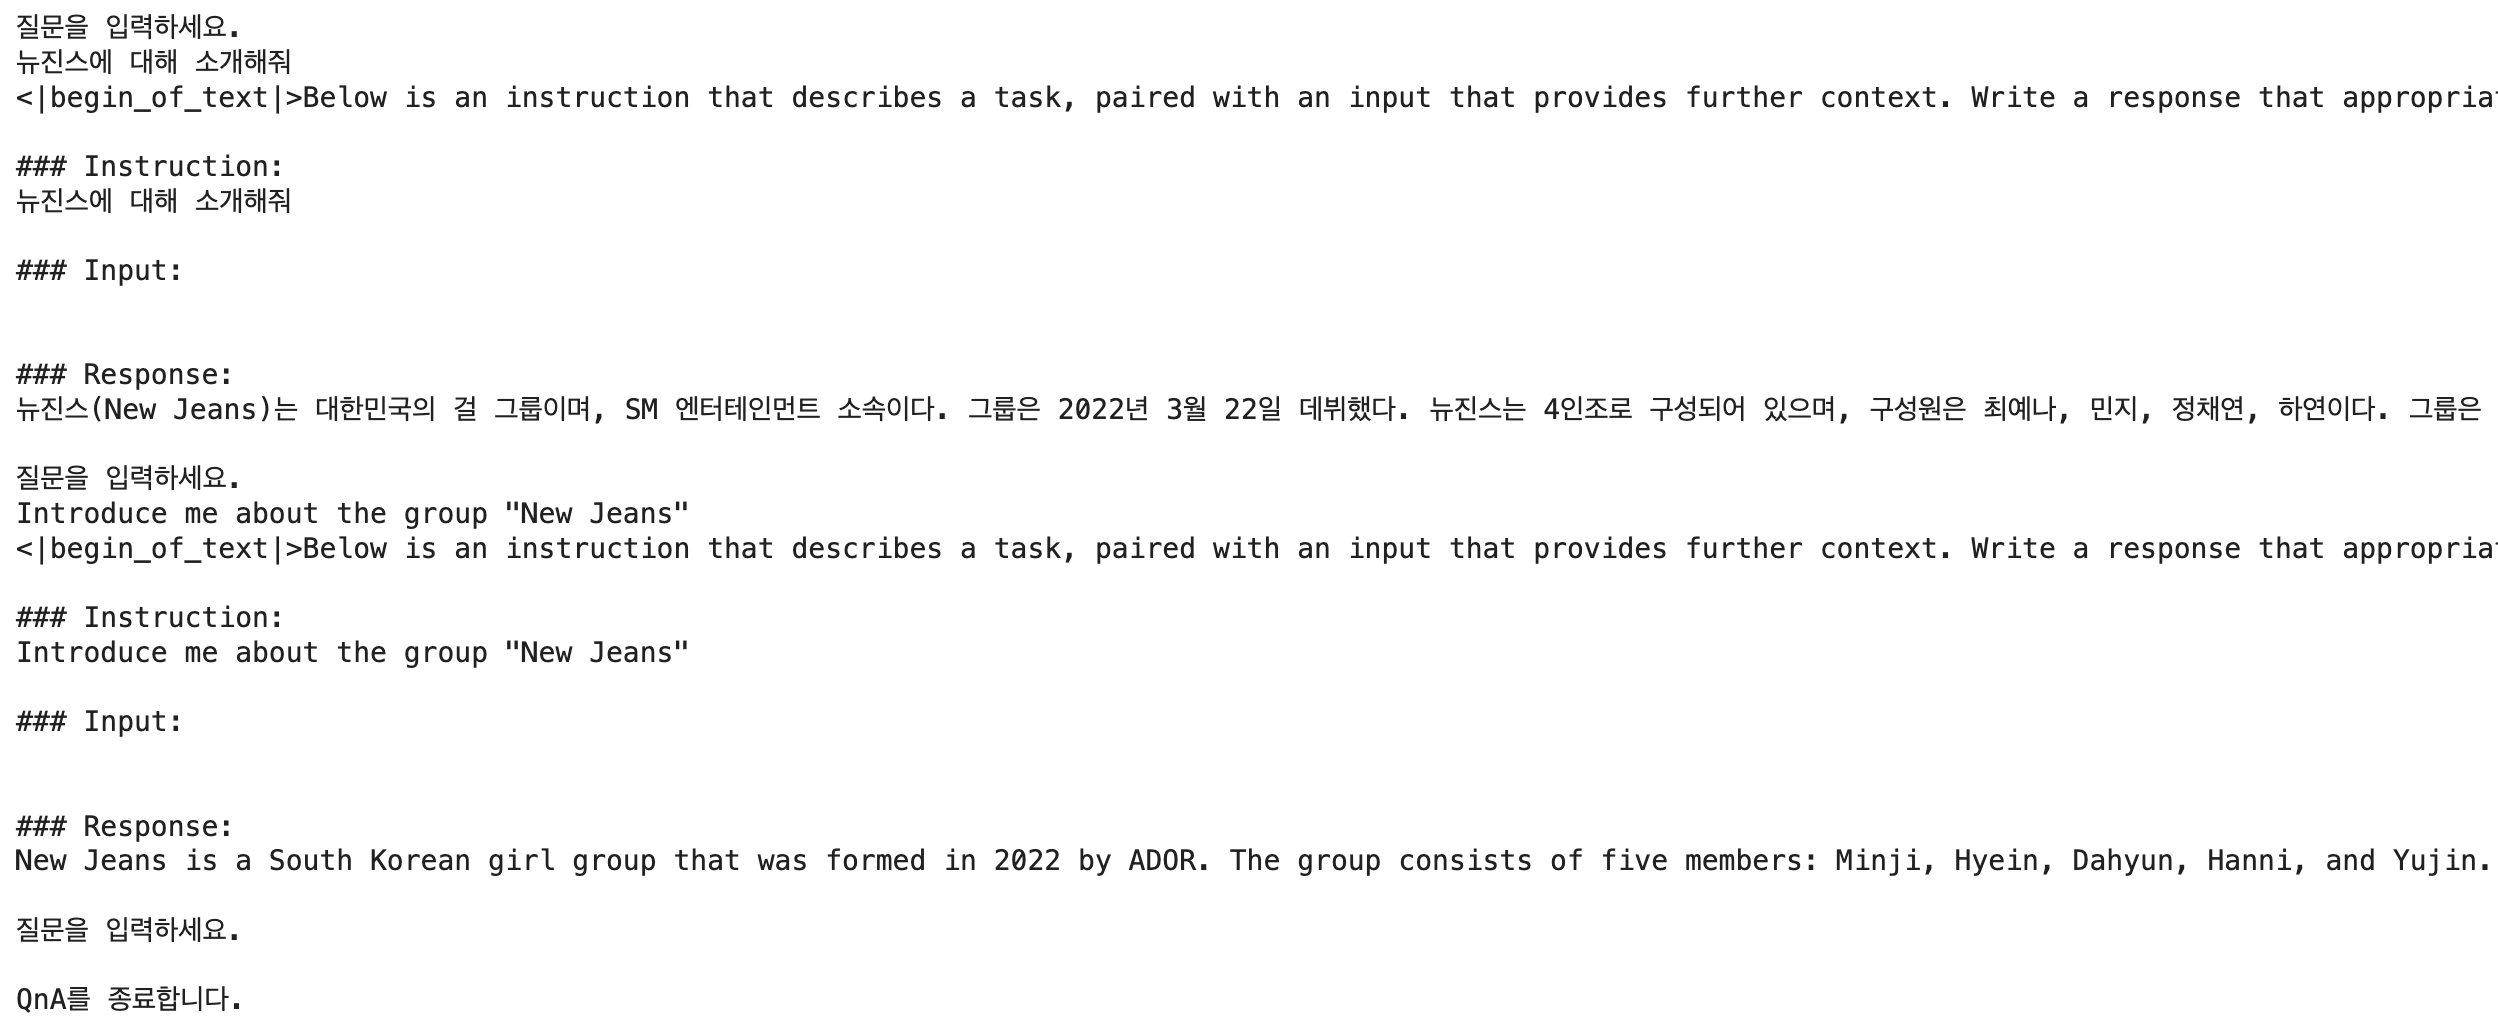
아무래도 학습 정도의 차이인 것 같은데,
한글을 잘 쓰긴 하지만 한글로 질문하는 경우에는 눈도 깜빡 안하고 거짓말을 술술한다..
영어로 질문했을 경우에 비해 조금 더 거짓말의 강도가 큰 경향이 있는 것 같다.
뉴진스 말고 테일러 스위프트에 대해서 영어로 질문했을 때는 100%까진 아니지만,
거의 완벽에 가까운 답변을 하는 것을 확인했다.
이런 부분들은 한국어 데이터셋으로 이쁘게 학습시켜두면 해결이 되지 않을까 싶다?
모델도 8B를 사용한 것도 아마 영향이 크지 싶다.
3090 후원받습니다..